
23 Light and Dark Activities for Toddlers
Receive regular lesson ideas, teaching tips and FREE resources!
Light and dark activities for toddlers offer a captivating and educational way to explore the fundamental concepts of illumination and shadow.
These activities engage the curiosity and imagination of young children as they discover the magical interplay between light and darkness.
From simple flashlight games to hands-on experiments with shadows, these activities provide toddlers with opportunities to develop their sensory awareness, creativity, and problem-solving skills.
Table of Contents
Shadow Play –

This activity is perfect for introducing toddlers to the concept of light and shadows. To set up, all you need is a strong light source and a plain wall or surface. Encourage your toddler to experiment with different objects and shapes to cast shadows on the wall. You could even use their own body to create fun and silly shadows. This activity promotes creativity and curiosity, as well as an understanding of basic scientific concepts.
Glow-in-the-Dark Sensory Bin –

A sensory bin is a great way to engage your toddler’s senses and spark their imagination. For this activity, create a sensory bin filled with various glow-in-the-dark toys and objects. You could include items like glow sticks, stars, balls, and even glow-in-the-dark paint. Turn off the lights and watch as your toddler explores the bin, discovering new items and experiencing the magic of glow-in-the-dark.
Related: 20 Amazing Kwanzaa Activities for Preschoolers
Flashlight Scavenger Hunt –

Toddlers love to explore and hunt for hidden treasures. For this activity, turn off the lights and give your toddler a flashlight to search for hidden objects around the room. You could hide items like toys, books, or snacks in various spots, and give clues to help them find each item. This activity promotes problem-solving skills and improves hand-eye coordination.
Light Table Play –

A light table is a fantastic tool for engaging your toddler’s creativity and imagination. You can purchase a light table, or create your own using a clear plastic storage bin and a string of LED lights. Provide your toddler with a variety of translucent objects like beads, gems, or blocks to play with on the table. The light illuminates the objects and creates a mesmerizing effect that toddlers will love.
Firefly Jar Craft –

This craft is a fun and simple way to create a unique glowing jar that your toddler will adore. To make a firefly jar, you will need a mason jar, glow-in-the-dark paint, and a paintbrush. Have your toddler paint small dots onto the inside of the jar with the glow-in-the-dark paint. Once dry, turn off the lights and watch as the jar illuminates with a magical glow. This craft promotes creativity and improves fine motor skills.
Shadow Puppets –

Similar to shadow play, shadow puppets allow your toddler to create characters and stories with their shadows. Cut out various shapes from black cardstock and attach them to wooden skewers or popsicle sticks. Use a strong light source and encourage your toddler to put on a shadow puppet show. This activity promotes creativity, imagination, and storytelling skills.
Glow Stick Bath –

Turn bath time into a magical experience with a glow stick bath. Simply activate a few glow sticks and toss them into the bath water. Turn off the lights and watch as the water illuminates with a colorful glow. This activity promotes relaxation and sensory exploration.
Flashlight Tag –
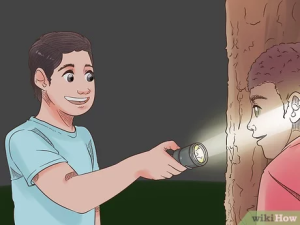
Flashlight tag is a fun twist on a classic game. Turn off the lights and give each player a flashlight. The goal of the game is to tag other players with the light from your flashlight. This activity promotes physical activity and improves hand-eye coordination.
Starry Night Sky –

Create a starry night sky in your toddler’s bedroom with glow-in-the-dark star stickers. Stick the stars onto the ceiling above your toddler’s bed. Turn off the lights and watch as the stars illuminate with a soft glow. This activity promotes relaxation and encourages your toddler to explore the wonders of the night sky.
Light Painting –

Light painting is a fun and creative activity that allows your toddler to create art using light. To set up, turn off the lights and give your toddler a flashlight or other light source. Have them wave the light around in front of the camera while you take a long exposure photo. The result is a stunning and unique light painting that your toddler will love. This activity promotes creativity and improves fine motor skills.
Moon Sand Sensory Bin –
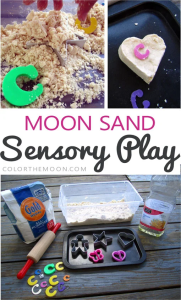
Moon sand is a fun and unique sensory material that feels like wet sand, but doesn’t dry out. Create a moon sand sensory bin for your toddler by mixing together flour and baby oil. Add in some glow-in-the-dark stars or other small objects for your toddler to discover as they play. This activity promotes sensory exploration and improves fine motor skills.
Light and Dark Sorting –

Create a sorting activity for your toddler using light and dark objects. Gather a variety of items like white and black pom-poms, toys, or blocks, and have your toddler sort them into two separate piles based on their color. This activity promotes color recognition and improves sorting and categorizing skills.
Flashlight Books –

Make story time even more exciting with flashlight books. Choose a favorite children’s book and read it with your toddler while shining a flashlight on the pages. This activity promotes literacy skills and encourages imaginative play.
Glow Stick Obstacle Course –

Create an obstacle course for your toddler using glow sticks. Place the glow sticks on the ground or hang them from objects to create a path. Turn off the lights and have your toddler navigate through the course while holding a glow stick. This activity promotes physical activity and improves gross motor skills.
Shadow Drawing –

Similar to light painting, shadow drawing is a fun activity that allows your toddler to create art using shadows. Set up a strong light source and provide your toddler with a white piece of paper and some objects like toys or blocks. Encourage your toddler to place the objects on the paper to create a shadow, then trace around the shadow with a pencil. This activity promotes creativity and improves fine motor skills.
Flashlight Hide and Seek –
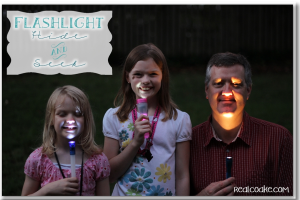
Put a fun twist on hide and seek by playing with flashlights in the dark. Turn off the lights and give your toddler a flashlight to help them find hiding family members. This activity promotes physical activity and improves spatial awareness.
Shadow Tag –

Shadow tag is a fun game that combines the concepts of tag and shadow play. Turn on a strong light source and encourage your toddler to run around and try to tag each other’s shadows. This activity promotes physical activity and improves hand-eye coordination.
Moon Phase Activity –

Help your toddler learn about the different phases of the moon with a hands-on activity. Create moon phases using Oreo cookies and have your toddler place them in order from the new moon to the full moon. This activity promotes science education and improves fine motor skills.
Light Box –

Create a lightbox for your toddler using a plastic storage container, white tissue paper, and a string of battery-operated LED lights. Place the tissue paper over the top of the container and poke holes in it, then add the lights. Turn off the lights and let your toddler explore the light box with their hands or small objects. This activity promotes sensory exploration and improves fine motor skills.
Dark Room Exploration –

Set up a dark room for your toddler to explore using only a small flashlight or other light source. Create a safe space by removing any hazards and allowing your toddler to explore the room using their flashlight. This activity promotes sensory exploration and improves spatial awareness.
Recommended:
- 24 Fun Small Group Activities for Preschoolers
- 22 Polar Bear Art & Craft for Preschoolers
- 25 Amazing Technology Activities for Preschoolers
Sohaib Hasan Shah
Sohaib's journey includes 10+ years of teaching and counseling experience at BCSS School in elementary and middle schools, coupled with a BBA (Hons) with a minor in Educational Psychology from Curtin University (Australia) . In his free time, he cherishes quality moments with his family, reveling in the joys and challenges of parenthood. His three daughters have not only enriched his personal life but also deepened his understanding of the importance of effective education and communication, spurring him to make a meaningful impact in the world of education.
Leave a Comment Cancel reply
Save my name, email, and website in this browser for the next time I comment.
- Skip to primary navigation
- Skip to main content
- Skip to primary sidebar
- MEMBER LOGIN
Hands On As We Grow®
Hands on kids activities for hands on moms. Focusing on kids activities perfect for toddlers and preschoolers.
3 Super Simple Light Experiments for Kids to Do
Literacy & ABCs Science Toddlers Grade School Kindergartners Preschoolers Experiment Paper Plates 19 Comments
Science experiments are always a big hit in my house and this light experiment for kids will brighten everyone’s day – literally!
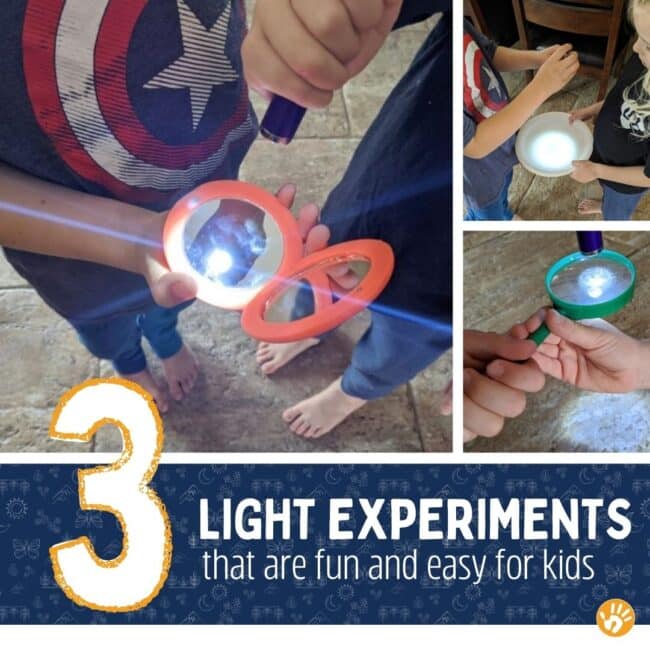
3 Super Simple Light Experiments for Kids
What three things can light do? This is the guiding question for this simple and fun light experiment for kids.
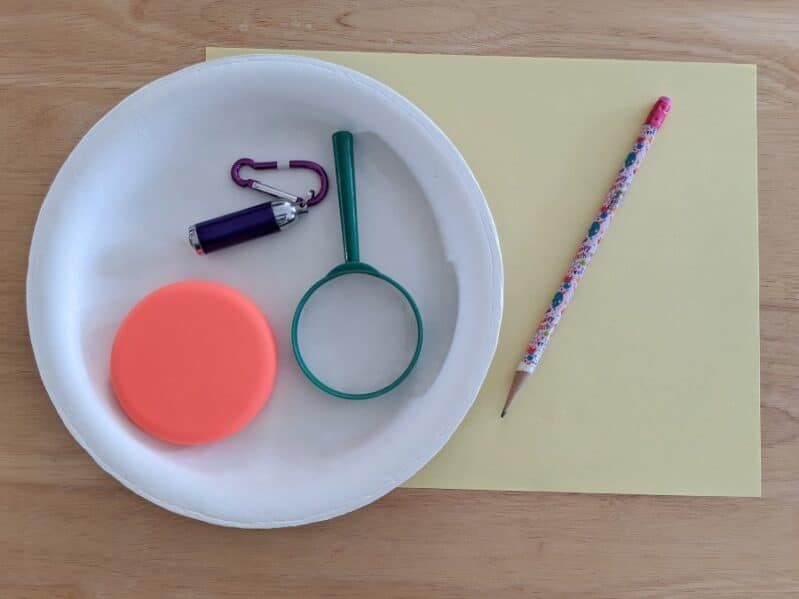
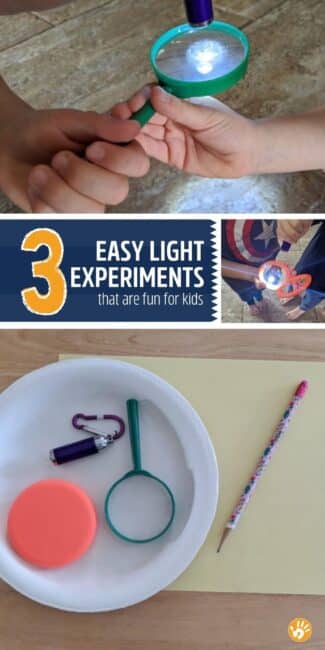
To Set up Your Own Simple Light Science Experiment, You’ll Need:
- Magnifying glass
- Paper plate or anything opaque
- Piece of paper
Try our favorite 50 simple science experiments .
Talking About Science Basics with Kids
Science activities are always a great time to practice using fun science terms. This simple light science experiment introduces three new ones:
- penetrate: or when light will pass through an object to be visible on the other side
- reflect: or when the light bounces back at you, like with a mirror or something shiny
- stop: or when the light is blocked, not reflecting or penetrating
- variable: what changes in different steps on the experiment
It can help if you write down these words and their meanings on a piece of paper or flashcards.
You could use actual words or draw a picture.
For older kids, you could also dive a little bit deeper. I love this quick explanation about the properties of light from Ducksters .
Before Your Light Experiments for Kids
This simple science experiment includes an opportunity for making predictions and recording observations.
Predicting is just making a guess based on what you already know.
You could get started by asking your kids: “What do you know about light?”
Create a quick and simple legend for the light experiment.
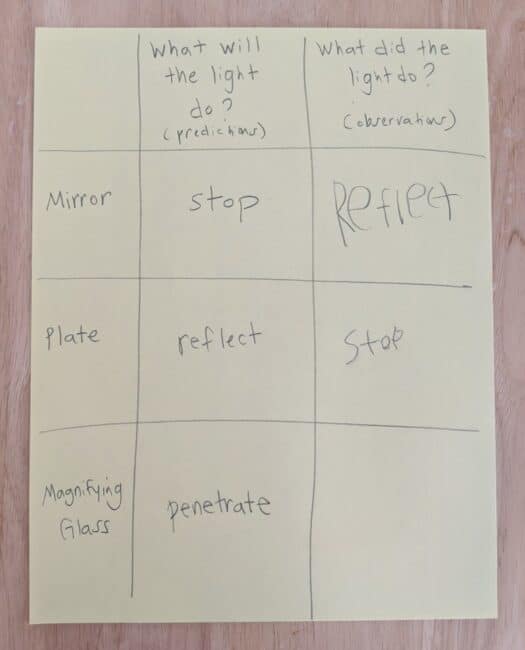
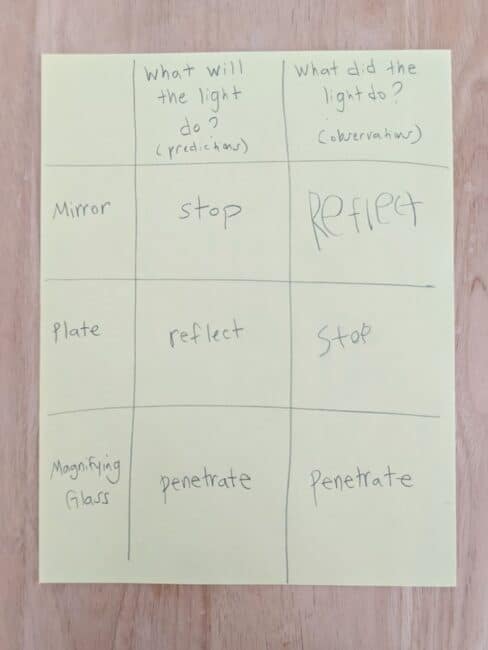
Write down your children’s predictions and make a quick chart. One column is for the prediction and the other is for the observation, plus some rows for the variables.
Label the rows with the names of your three objects, or variables (what’s changing each time). Hint: mirror, magnifying glass, plate, etc.
At the top of one column write: “What will the light do?” . (Prediction)
And then above the other column, write: “What does the light do?” . (Observations)
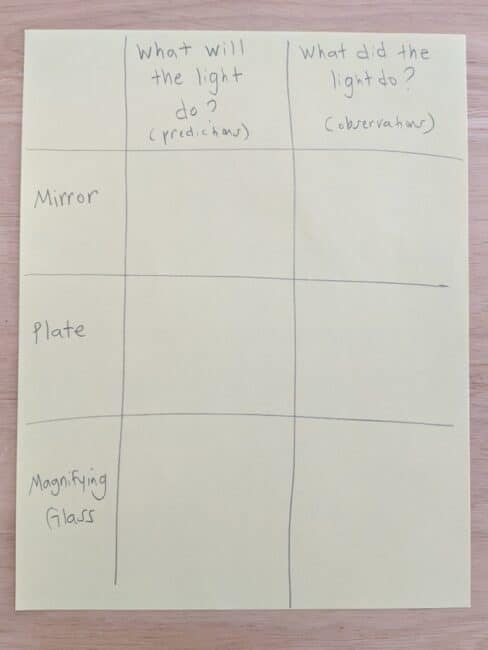
As you experiment, you’ll also jot down what happens with the light, or what you observe. Observe and observation in science is just a fancy way to explain telling what you saw happening during the experiment.
Ask these helpful questions as you predict what happens:
- Will the light penetrate the paper plate or will it stop?
- Will the light reflect off of the magnifying glass or penetrate?
- And will the mirror stop the light?
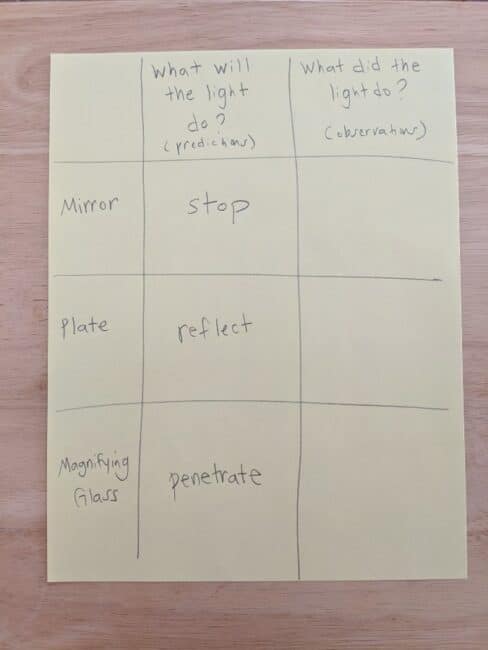
Take time to look at each object, discuss the three terms associated with light (penetrate, reflect, stop).
Make predictions, or guesses, about what the light will do with each object.
Write your predictions in the first column of the chart.
Now Experiment with Light Together
Once your predictions are made and the properties of light have been discussed, it’s time to do the experiment.
Choose the first object and have your kids shine the flashlight at the object.
Watch how the light reacts with the object. Does it shine through, shine back at you, or stop completely?
Record on your observation chart what the light did with that object. Check to see if your predictions were correct.
Keep going with the rest of the objects, making sure to observe and record your findings.
Our Easy Light Experiments for Kids
We chose the mirror first. My son held the mirror and my daughter used the flashlight.
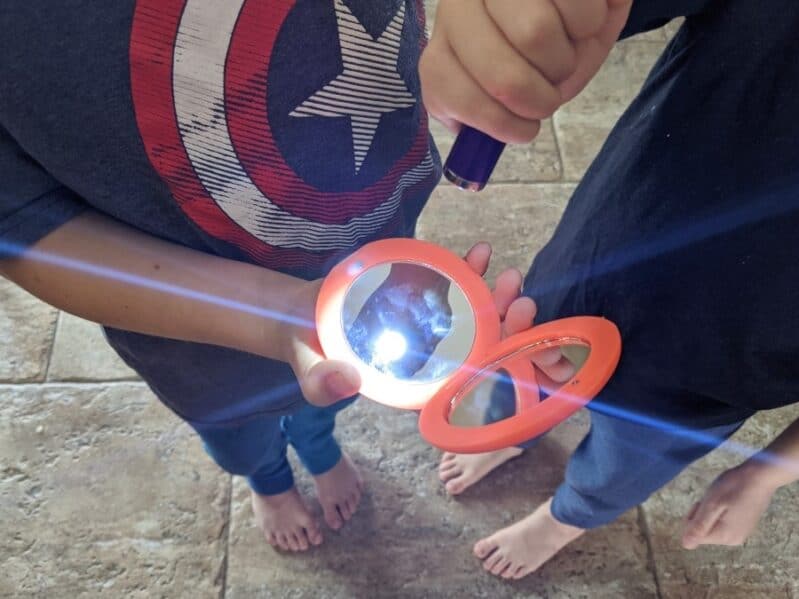
I encouraged them to explain what they noticed about the light. Both recognized that the light was shining back at us, or reflecting.
We talked for a minute about using “refect” to describe what the light was doing.
Keep shining with a simple indoor reflection activity !
My daughter wrote “reflect” in our observation column on our chart. I helped her with the spelling, but only a little.
The Paper Plate
Our second variable for the light experiment was the paper plate. This time my kids switched roles with my daughter holding the plate and my son shining the flashlight at the object.
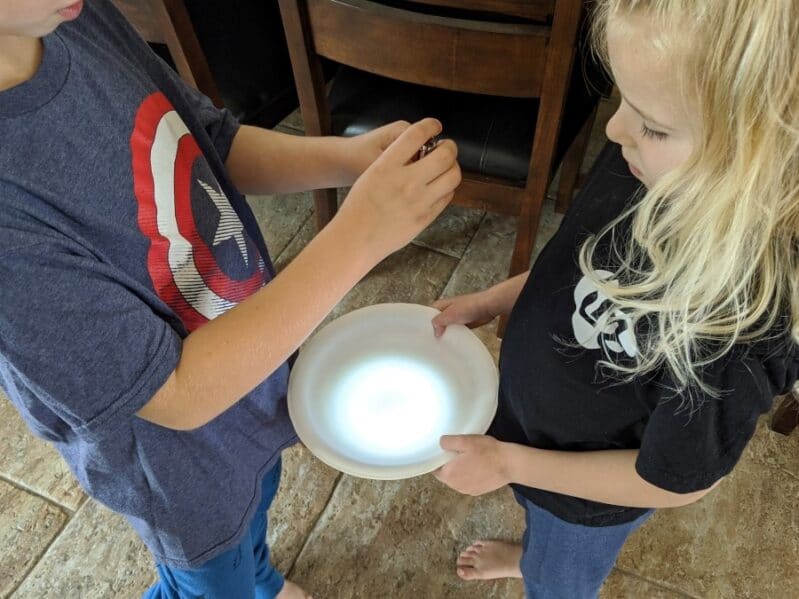
My kids quickly noticed that the light didn’t go anywhere except for on the plate.
We discussed together how this showed that the light stopped because the plate blocks or stops the light. I also added in the word “opaque,” which means that light does not pass through.
My son recorded “stop” for the plate.
You can also introduce the word “absorb” to your kids at this point in the experiment, as that is another term for stopping the light.
Originally, the kids had thought that the plate might reflect the light. Our prediction was incorrect and we talked about that for a minute or so.
Learn more about opaque objects with a fun shadow play activity !
The Magnifying Glass
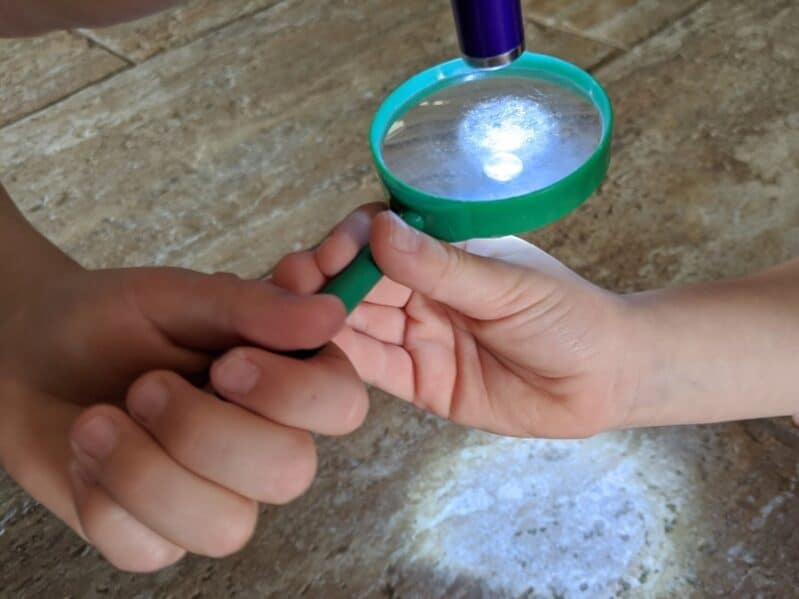
Our final object was the magnifying glass. It was my turn to shine the light as both my kids held the object.
This time the light went through the magnifying glass, shining onto the floor below. I shared the term “transparent,” meaning that light passes completely through, as we talked about this part of the experiment.
I recorded our findings on the chart. We reviewed each object and outcome together while comparing our observations to our predictions.
Keep Playing with Light!
Even though we had finished the “formal” experiment, my kids kept the learning going! They ran through the house, shining the flashlight on all sorts of objects and saying whether the light reflected, stopped, or penetrated.
I love how much ownership they took of their learning!
We love playing with a fun flashlight scavenger hunt for kids !
This fun extension activity went on for quite a while. And it’s something that I know I can keep returning to again and again, adding more challenging terminology as they grow.
What are some other fun science experiments for kids you have done? We’d love to check-out your creative learning ideas!
Want to save this activity.
Enter your email below & we'll send it straight to your inbox so you can access this activity later! Plus, you'll get simple activities from us every week!
- This field is hidden when viewing the form Activity URL
- This field is hidden when viewing the form Activity Title
- Phone This field is for validation purposes and should be left unchanged.
About Alisha Warth
I have raised my children doing activities with them. As a homeschool mom, I am always looking for ways to make our learning fun. I'm honored to be able to contribute my ideas to the awesome site that is Hands On As We Grow.
More Hands on Kids Activities to Try
Reader Interactions
19 comments.
Stacey A Johnson says
November 24, 2020 at 8:46 pm
This is fantastic! Thank you for sharing! I have been putting science bags together to send home for my kinders because we are doing online school….I was looking for some light activities because we are going to tie them into the holidays we study in December. (The idea that most celebrations, customs, rituals, use some sort of light) I can’t wait to do this with them!
MaleSensePro says
February 10, 2020 at 11:29 pm
Its a great learning experience.. its indeed the best kind of way kids should learn, thanks for sharing :)
Leave a Comment Cancel reply
Your email address will not be published. Required fields are marked *
This site uses Akismet to reduce spam. Learn how your comment data is processed .

What Parents Have to Say…
- Hands On As We Grow Newsletter "It is hard to think of things to keep the 3 year old entertained and engaged while taking care of the baby. Everything we have tried so far from your website, the three year old has loved. Your ideas are so simple and he can do them for hours. HEAVEN!" - Karen I.
- I am now one happy Dad! "You have changed how I spend time with my kid in so many positive ways! I am now one happy dad that no longer wonders what I am going to do with this little guy for the next 12 hours :P Your site was this first time dad life saver!" - Jack C.
- Hands On As We Grow Newsletter "I feel like a new mama having so many fun ideas. I used to dread the afternoon, after naps, as it was so boring doing the same thing day after day but now I look forward to our "play" time!" - Haley S.
- Free Activity Challenge "Thank you so much for these activities. They have proven to me that I CAN be that mom that does cool and creative things with her kids! And those cool and creative things can actually be quite simple! What a revelation. Thank you!!" - Katie M.
- Activity Plans eBooks "This takes down the need to scour the internet for ideas. It's like looking for a recipe on the internet, so many options that often times it is less overwhelming to look in a book on the shelf than stress about too many options." Robyn G
- So organized and easy to use. I have found it impossible to Google ideas from a million different sites, get organized, shop for supplies, etc. This is exactly what I have been searching for! Thanks for making something so organized and easy to use. - Early Years Activity Plans User, Melissa C.
- The Activity Room Member "I absolutely love that this takes all the prep work out of engaging my children. It is so easy to just put up the calendar, and glance at it for inspiration when we are in a funk." - Rachel
- Grateful to have activities handed to us... "There's always something new for us to discover, as well as old favorites. I am so grateful to have activities handed to us... Fun and easy ones that can be put together in a moment's notice! You're awesome Jamie and I appreciate you sharing your activities and ideas!!" - Melissa C.
Shop eBooks of Activities

Get activity plans delivered to your inbox, every week!
Activities that hands-on parents absolutely love.
50+ Simple Activities for Toddlers
Gross Motor Activities for Preschoolers: The Top 35!

35 Name Activities For Preschoolers

Why Routines for Kids are Important
25 Sensory Activities for Kids with Sensory Tubs & Further Exploration
50 Simple & Fun Alphabet Activities for Preschoolers
Get started having fun with your kids.
PLAN THE FUN WITH THE FREE KIDS ACTIVITIES PLANNER! AND RECEIVE ACTIVITIES EVERY WEEK!
- Preschoolers
- Kindergartners
- Grade School
- Literacy & ABCs
- Math & 123s
- Art Projects
- Gross Motor
- Shop Activity Plans
- Member Login
- New York City
- Dallas Fort Worth
- Miami South Florida
- Philadelphia
- Washington DC
- Los Angeles
- San Francisco Bay Area
- Connecticut
- Long Island
- Westchester
HOME - New York City
Activity calendar, this week's picks, activity providers, submit an activity.
- News & Openings
NYC Baby Guide
Nyc for preschoolers, tweens & teens, neighborhood guides.
- Parks & Playgrounds
- Free Activities
Visitors' Guide to NYC
- Restaurants
NYC Moving Guide
Crafts for kids, science for kids, at home activities, online & virtual, camps guide, classes guide, preschools & schools guide.
- Birthday Parties
Party Providers
Best of spring, best of summer, best of fall, best of winter, family vacations.
- Theme & Water Parks
Resorts & Hotels
Adirondacks, hamptons & north fork, poconos guide, jersey shore guide.
- Staten Island
- Beaches & Lakes
- Best Of Lists
- Boredom Busters
- Christmas/Hanukkah
- City Guides
- Classes & Enrichment
- Crafts & Recipes
- Fairs & Festivals
- Fall Activities
- Family Travel
- Farms & U-Pick
- Hotels & Resorts
- Indoor Activities
- Parent Talk
- Play Gyms & Sports Centers
- Pools & Spray Parks
- Preschools & Schools
- Skiing & Winter Sports
- Special Needs
- Special Occasions
- Spring Activities
- Stores & Services
- Summer Activities
- Trains, Dinos & Heroes
- TV, Film & Movies
- Visitors Guide
- Weekend Events
- Weekend Trips
- Winter Activities
- Zoos & Gardens
10 Simple and Fun Light Experiments for Toddlers and Preschoolers
We've all made hand shadows with flashlights when the power goes out unexpectedly, but have you tried lowering the lights on purpose for playtime? Light experiments are a magical form of sensory exploration with well-documented developmental benefits for kids, while happening to be deceptively simple for even the laziest parent (like me). Setting up a dark environment and incorporating flashlights into your play unlocks a whole new way of looking at the world, mesmerizes tumultuous toddlers, and brings open-ended process play into your home with minimal effort. Light experiments can even work wonders on children who fear the dark.
So cut the lights and grab your flashlights (check for batteries first, because dead flashlights are a bummer) and try out these 10 easy light and shadow experiments for toddlers and preschoolers. For more preschool and toddler science ideas, check out our list of science experiments for toddlers , and more science fun for kids of all ages in our Guide to Science Experiments for Kids .
OUR LATEST VIDEOS
10 light experiments for toddlers and preschoolers.

1. Colorful Shadows
2. shadow tracing.
Cast a shadow on a piece of paper and trace its outline, or head outside on a sunny day with sidewalk chalk and trace the trees. Bigger kids can pose in front of a light source for a silhouette portrait as you trace their profile.
Related: Crafts for Kids: 100 Awesome Art Projects for Creative At-Home Fun

3. Shadow Show
Hang a sheet in a doorway and arrange a light from a distance to make a shadow screen. Use toys to tell a story, or create your own shadow puppets using cereal boxes and popsicle sticks.
4. Let it Glow
Toss some glow sticks into the tub to level up bath time.
Related: 30 Easy Paper Crafts for Kids for an Arty Day at Home

5. Baby Rave
Channel your inner raver—toddler style—with a cheap black light and some highlighters or neon art supplies. You can even make neon rice for an added sensory experience.
6. Hand Shadow Puppets
Transform that peace sign into a bunny to make a simple hand shadow, or get fancy with these handy (sorry) shadow puppet ideas .
Related: Science Experiments at Home: Make a Walking Water Rainbow with Kids

7. DIY Light Table
Rig up a light table with some holiday lights and a clear storage bin. Play on top of the light with tissue-paper scraps, bingo chips, or translucent shapes.
8. Glowing Games
Place some glow-stick bracelets into balloons, blow them up, and bounce them as they glow. You can also use those bracelets for a glowing game of ring toss!
Related: 64 Easy Science Experiments for Kids to Do at Home

9. Catch the Sun
Explore natural light by making a simple and colorful sun catcher and placing it on a window.
10. Rainbow Play
Shine a light on old CDs, mirrors, a prism, or even a glass of water to experiment with splitting light into a rainbow. Check out our roundup of rainbow crafts for kids for more crafty and colorful inspiration.
All photographs by author Liz Baill @creativishmom
Featured Local Savings

Inventors of Tomorrow
Hands-on science and engineering education for kids age 3 – 6, light and shadow experiments for kids.

I teach a STE(A)M Enrichment class for kids age 3 – 6. One of the hands-on science classes we teach is about Light and Shadows. All the activities here are also great for a Groundhog Day theme at a preschool or elementary age class. This post includes
- a free kids’ book you can download and print
- a shadow play activity – you hang a sheet and shine a light – they use shadow puppets or make hand shadows or shadow dance
- hands-on science activities including shadows from an overhead projector, a sundial craft, a laser maze game, and more
- art projects – shadow puppets, paint shadows, silhouettes and sun prints
- circle time activities and song
- recommended books and videos
- an arts extension activity – build a shadow puppet theatre and write a play
Book / Overview of the Science

I wrote a kids’ non-fiction book which covers all the key ideas about light and shadow. It includes lots of easy experiments to try. You can read it (or print a copy) here .
With our class structure, we begin with “discovery time”, where the kids have an opportunity to explore all the activities hands-on, and start discovering how things work, testing theories, and making observations. This allows questions to naturally arise, raising their curiosity about what’s happening. Then we have opening circle, where we read pages 1 – 10 and 19 – 20 of the book, which explains the phenomena they’d observed. We also do the demos included in the book during circle, and then encouraged them to try out all those same experiments during our “tinkering time” where they return to exploring all the activities, this time with a theoretical framework for what they’re seeing. In closing circle, we read pages 11 – 18 about about daytime and night-time shadows, and pages 21 – 22 which talk about shadow puppet theatre and hand shadows – this prepares us for reading Shadow Night.
Shadow Play
Shadow play set-up.
The surface : You could simply shine a bright light on a wall or a white board, and let your children dance between the light and the wall. But, it’s even cooler if you can see BOTH sides of the surface the shadow is cast on. My co-teacher built a fabulous screen of a white sheet supported by a PVC frame. It was held up by two very heavy patio umbrella stands so even with a fair amount of rough-housing, it never came close to tipping over. Alternatively, you could hang a white shower curtain or sheet in a doorway, either with a tension rod, or just taping it above the door frame.

The light : Behind the screen, we use an LED Work Light, which is very bright, but cool to the touch . (PLEASE don’t use an incandescent or halogen shop light as they can get very hot!!) We happen to have an interior room with no windows, so it’s easy to get the room dark enough to get good shadow effects – it might be harder in a window-filled room.
You could also use colored lights. (Read about our multi-colored light experiment .)
The “invitations to play”:
Hand Shadows: We put up posters showing diagrams of hand positions for shadow puppets to inspire them to play with hand shadows. I made a poster showing how to do the 7 shadow puppets that appear in the book Shadow Night which we would read in closing circle. (see below)
Shadow Puppets : Stuffed animals and shadow puppets that they can use to make shadows. They could also make their own shadow puppets to test. (See below.)
Shadow Dancing : Or kids can just do crazy dances behind the screen! (Often kids on the “audience” side of the screen mimic the motions of the child behind the screen.)

Flashlight Play : We also offer lots of flashlights, mirrors and toys, so kids could freely play with reflecting light, and with playing with how they can change the size and shape of a toy’s shadow depending on how close or far away they hold the flashlight, and what angle they hold the flashlight at related to the toy. (This is a direct echo of some experiments from our book.)
Hanging shadows . You could hang a clothesline across a room and hang a lot of items on it. Hand the child a flashlight and turn off the lights – they can walk up and down the line, shining the flashlight at all angles, finding the shadow in the room.
Light and Shadow Science Exploration
Projector Shadows : We have an overhead projector , so set it out with some opaque items (blocks, etc.) and some glass tile samples that make really cool shadows. Here’s a picture of the items on the projector surface and then their image on the wall. We use this again in Rainbows week.

Challenge of the Week – Engineering Project: Sundial. Create a sundial with a paper plate, straw or pencil, tape, glue and glass globules.
If you’re with your kids / students all day on a sunny day, here’s the process: Poke a hole in the center of the plate. Tape a pencil or straw upright in the hole. On an hour mark (at 9:00 exactly or 10:00 or whatever), take the plate outside, and tape it in place in the sun. Mark a line where the shadow falls, and write the time. An hour later, come check the shadow and mark a line for the time again. Repeat on the hour all day long till your sundial is complete. The next day, check it again to show that it’s still working. You can pick up and move the sundial as long as every time you set it down, you orient it the same way. (More info on this project at: www.nwf.org/Kids/Family-Fun/crafts/sundial.aspx or www.kidsplaybox.com/kids-crafts-homemade-sun-dial/ )
Since we only have our students for a couple hours, and since the weather forecast in Seattle is often gray skies and rain, my co-teacher preps a template a few days ahead of time (on a beautiful sunny day) and we do a slightly different process. We put the pencil in the center of a plate, then slide on the paper template, which is smaller in diameter than the plates, then the child marks off all the times. Then we remove the templates and they decorate their sundials. We use a flashlight to illustrate how as the sun moves through the sky, the shadow shifts to indicate the time of day.
As you can see from the third photo, sometimes we put out the supplies for one project (a sundial) and children do something completely different than we had expected… we’re OK with that. (Our only rule for projects is “Be Creative, Not Destructive”, aka “Make not Break.”) We still showed this child how the shadow would shift as the day went on, landing on different Shopkin drawings at 8 am than it did at 1 pm.
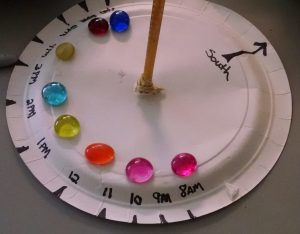
Optional Outside Activity, if the sun is shining: Students set-up their sundials in the sunshine and see where the shadow falls – and check whether it’s correct about the time.
Laser Maze. We own a great board game called Laser Maze . It’s a Think Fun game, where there are a series of puzzles of increasing difficulty. The child sets up the board as shown on the card, then turns on a laser, sees where it’s shining, and adds mirrors and obstacles to the board to re-direct the light into the goal for the puzzle. Teaches not only the idea of reflecting light, but also a good logic puzzle. Our little kids just dinked around with the pieces, but kids age 5 and up became totally absorbed in working their way through the puzzles.
Reflection – Mirror Boxes. We also built simple mirror boxes (taping together three square mirrors in a half-a-cube shape), and gave kids materials to arrange in there to make symmetrical patterns. Learn more about mirror boxes at Imagination Tree . BabbleDabbleDo has some fun templates kids con color in and check out the reflections of. I also like the flexible, cuttable mirrors , that you can bend to different angles. Or you can tape two mirrors together so they have a flexible hinge you can adjust. Learn more at: https://www.exploratorium.edu/snacks/corner-reflector

STEAM Activity: Exploring Light Refraction: Put out glass jars and containers, some filled with water, some not. Have posters with different color stripes, and an arrow. Have kids look through an empty jar at the poster. Then pour water into the jar – the image flips. Have them experiment with the different size jars, with different size drawings and moving the image closer or further away. http://gosciencegirls.com/refraction-light-glass-water-play-steam-kids/ (Note: Refraction is the light bending when it hits the water. Diffraction is light spreading out around an obstacle.) I’ll warn you – I’ve had mixed success with this activity. I’ll test it at home and it works perfectly, and I bring the exact same glass to class, and it won’t work there. I’m not sure why. 😦

Light Table and Water Table: Some years, we have the light table out with a variety of translucent items for free exploration and, separately, the water table filled with colorful water beads floating in water, and a couple flashlights to shine on them, to shine up through the bottom of the table. Other years, we put the light table under the water table to shine up through there. and put all the translucent items in the water.

Art Projects
Shadow Puppets . We had cardstock, markers, scissors, tape, and popsicle sticks so they could make their own shadow puppets. The first year, we made the mistake of putting out white paper and no examples, and there were some puppets that were lovely stick puppets (first picture below). But all those marker decorations on the dragon will never show up in a shadow. What we needed to communicate better was that the point of a shadow puppet is the outline / silhouette. So, in other years, we had some sample puppets, and a poster with more sample puppets to give kids a better sense of what kinds of designs to make. (For preschool age, you may just want to offer pre-designed shapes to cut out.)

Art Project : Paint Shadows (Source for idea: http://tippytoecrafts.blogspot.com/2012/02/negative-art.html )
Basic idea : A child lays their hand on a piece of paper, with fingers spread wide, and you spray paint on to it. (Tell them this is like sunshine shining on their hand – the light rays will spread outward and continue till they run into something that blocks them, and that makes a shadow.) When they lift their hands off, a shadow is left behind. Here’s a poster to explain the idea… The poster also includes photos of several ancient cave paintings of paint shadow hands , including some from Indonesia believed to be 40,000 years old.
Logistics : We filled a spray bottle with white kid-safe / easy clean-up paint mixed with water… the goal was to thin it enough that it would spray easily and not clog the sprayer, but not so thin that it would run. You can either put a piece of paper on the easel, and this is a take-home project OR you can cover a whole table with paper and do a group artwork. The first year, we’d planned for the kids to do the spraying themselves (good fine motor practice) but with our sprayer, if you were too close to the paper (i.e. kid’s arm-length away), the paint stream was too focused. You had to stand back a few feet to get a nice spread-out spray of paint – and no kid could stand that far back and not make a big mess! So, we now just have an adult do the spraying. Have a tub of soapy water and a towel right next to this project so they can wash their hands right away.
Shine a Flashlight Craft
We found this idea at Gilbert House Children’s Museum in Salem, OR. To prep: cut the beam shape out of black paper. Fasten the black paper to the yellow paper with a brad paper fastener. Then add the flashlight to the black paper. Children turn the top paper to “shine the flashlight” somewhere, and add a sticker or a drawing to show what the flashlight revealed. Turn the beam again and add more pictures.

Here is an alternate method from https://giphy.com/gifs/jOmTdhe0FhSe8EXMI5 . First draw pictures on a ziplock bag. Then, put black paper inside the bag. Make a paper flashlight with a white beam. slip it between the black paper and the drawings on the bag and move it around to illuminate the drawings.
Sculptural-Engineering Activity: Kids sculpt a shape or cut a shape from aluminum foil, then tape it to a cardstock square. Then they place it in front of a bright lamp and trace the shadow then colored in the shadow. (Source of idea: http://doodles-and-noodles.blogspot.com/2012/10/figurative-sculpture.html )
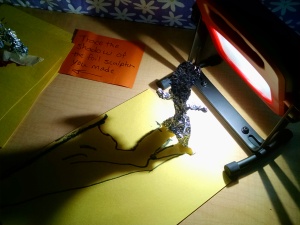
This activity is best for 6 – 7 year olds. The younger ones have a harder time figuring out how to make a three dimensional sculpture. If you’re working only with little ones, you might find it better to just use plastic toys / action figures and have them trace and color in their shadows on paper. I prefer the sculpture activity where they go home with BOTH the shadow tracing AND the sculpture it’s based on, but for little ones, it was just too tricky. If you use toys, be sure to choose ones that make fun shadows!

Mural of kids’ shadows . You could tape a big piece of paper on the wall. Then shine a big light or projector at it. Have kids stand by the wall so their shadows fall on the paper. Trace their shadows.
Silhouettes . Put paper on wall. Have the child sit sideways in front of the table. Shine a bright light on them and trace their silhouette. I recently had a conversation with someone about how this was a “thing” in the 60’s or 70’s, so all of us who were kids back then remember having a silhouette of ourselves.
Projection Tubes: I love this easy idea from Moon Child Adventures . Cover one end of a TP tube with saran wrap. Rubber band it. Put a foam sticker on. Now shine a light through it at the wall. It projects the image.

Summer Activity : Sunprints. You can purchase special photo-sensitive paper (called sun prints, or Sun Art Paper .) You set it outside in the sunshine, with various items on it for a period of 15 minutes to a few hours (depending on the product and how bright the sun is), then you remove the items. and you’ve captured the image / shadow permanently. (See example here .) They’re really VERY cool – I love them. BUT… in the Pacific Northwest, I find that they don’t tend to work most of the year – our winter sunlight just isn’t intense enough. I have gotten them to work on very sunny summer days. Opening Circle:
This is how we did it last year, before I wrote the book we used this year.
We asked the kids what makes light – what light sources could they think of. As they suggested them, we drew them up on the board to reinforce what was said.

We demonstrated a few light sources, including a flashlight that created a very diffuse light and a laser pointer which created a very focused light.
We then talked about shadows and when they see them, and what makes them, and so on. We demo’ed some hand shadow puppets on the screen. We did a little mini puppet show with some paper shadow puppets.
We talked about the difference between Opaque Shadows = No light getting through and Translucent shadows = Some light shining through, and demo’ed this with some colorful scarves and the translucent Duplos.

Song – We’re still looking for a great sing-along about light or shadows for circle. A couple options, both to the tune of Frere Jacques ( Source 1; Source 2 ), and my variant. Have the kids mimic the shadow shapes as you sing about them..
I see shadows, I see shadows, On the wall, In the hall. Some are short and scary, Some are round and hairy, Some are small, Some are tall.
Another song is to the Itsy Bitsy Spider tune:
My Itsy Bitsy Shadow Follows Me Around. The sun is up high so my shadow’s on the ground. When it’s gray and cloudy, my shadow goes away. I know that I will see in on the next sunny day.
There’s also Hi Shadow and Bindi’s Shadow Song .
Closing Circle
One teacher read the book Shadow Night (see below) while the other acted out the puppet show with hand puppets at the shadow screen. One of my favorite circle times of the year! (Note: one year we didn’t have the book, because we failed to pick it up at the library the day before. So I scribbled out a similar Shadow Story that we could use.) Books (contains affiliate links)
Stories about Shadows

- Lights Out by Medearis and Tadgell. Part of the Just for You series featuring African American families. Nice illustrations, good rhythm and rhyme to the text. “‘Good night, sleep tight!’ Daddy tucks me in. Out go the lights. Now the fun begins!” Sweet story of a daddy tucking a child in to bed, then her sneaking out to look at the city lights and make hand shadow puppets and then sneak back into bed. Nice preschool read-aloud or easy read for a new reader.
Non-Fiction Books on Light and Shadow
- What Makes a Shadow by Bulla, illus by Otani. ( Video of read-aloud.) This is an engaging, clear overview of the science of shadows for kids age 4 – 6. Highly recommended. It’s a little long to read straight through for a preschool level, but could be broken up into two group times.
- Oscar and the Moth: A Book About Light and Dark by Waring. This book is a conversation between a cat and a moth that explains how the earth rotates and that causes day and night, explains that light can come from the sun, the stars, electric light, and animals that emit light. It also explains that shadows happen when something blocks the light. A nice overview of lots of scientific ideas, told in a way that not only makes sense to preschool age children, but is engaging as well.
- Follow It!: Learn About Shadows by Hall. Non-fiction, covers all the basic ideas about shadows. Does a great job of gathering the key ideas about shadows, but the writing isn’t very engaging. Good resource for ages 4 – 6.
- Day Light, Night Light: Where Light Comes From by Branley and Schuett. Branley worked at the Hayden planetarium and has written many kids’ science books. Like his other books, this is a really good summary of the scientific facts, for kids 5 – 8. We don’t read his books in class because they’re too long and over the heads of half our kids, but they’re quite good.
- More ideas for demos and activities here: https://stardate.org/sites/default/files/pdfs/teachers/ShadowPlay.pdf
- There’s some great Sid the Science Kid episodes on Light and Shadow. Find it atL http://www.pbslearningmedia.org/collection/sid-the-science-kid/?topic_id=339 or https://kcts9.pbslearningmedia.org/resource/47861fd4-683a-4924-b490-3d53055309af/47861fd4-683a-4924-b490-3d53055309af/#.W0kXUdJKiM8
- There’s a Sid online game where kids have to guess what shapes are put together to make a shadow. You’ll need to manipulate the mouse, but a 4 year old should be able to play the game effectively. http://pbskids.org/sid/shadowshow.html
- Peep and the BWW also has a shadow episode: https://www.youtube.com/watch?v=Ty0C8mH4Jy8
- https://www.youtube.com/watch?v=7kVRQTfzS-I
- This video shows simple hand puppet shadows to make: https://vimeo.com/59196587 . (I bet if you search on YouTube you’ll find lots more examples.) There are multiple free apps you can download that show you lots of different hand puppet shadows to make… just go to your app store and search for hand shadow puppets. If you want to see a couple of amazing professional hand puppeteer shows, check out youtube.com/watch?v=hFe7eLwAXoc and youtube.com/watch?v=CPFto6ghMV4
- Watch Grover from Sesame Street sing about his Furry Little Shadow .
- Watch a violinist play with her shadow in this very cool video…. https://www.youtube.com/watch?time_continue=1&v=JGCsyshUU-A
- Another out of control shadow… https://www.youtube.com/watch?v=zRMhoJCQN_0
Optional Arts Extension – Shadow Puppet Theatre
- Make a shadow puppet theatre using a cereal box and either waxed paper or printer paper. There are great how-to tutorials both at Jimmie Lanley’s Hub Page (which also includes links to other info about shadow puppets) and on the website for Kix cereal .
- For a great tutorial on all the steps to creating a puppet show (writing or choosing your story, finding images for characters and props, making your puppets, building a screen, rehearsing and performing), see My Kids Adventures . It also includes a link to a ten minute documentary on traditional Chinese shadow theatre.
- More info on shadow puppets at Coolest Family on the Block .
- Watch a shadow puppet show here https://www.youtube.com/watch?v=b04NqLb7Myc. You can watch a kid-created shadow play at https://www.youtube.com/watch?v=bqzv162GBWg Or, for a beautiful work of art, watch https://www.youtube.com/watch?v=VR6_m_qXbKg&t=215s
Share this:
- Click to share on Facebook (Opens in new window)
- Click to share on Twitter (Opens in new window)
- Click to share on Pinterest (Opens in new window)
- Click to print (Opens in new window)
- Click to email a link to a friend (Opens in new window)
35 comments
[…] Light and Shadow Experiments for Kids […]
These are all such wonderful ideas! Thanks for inviting me over to take a look!
Hello! For one of my classes, I am teaching a group of students about light and shadows and love the building activity:) Where did you get the translucent duplos?
They are in the supply closet at my classroom, but I have no idea where they came from. They are not Duplo brand, but are “duplo compatible” – and thus not as nice quality. If you search for “clear Duplo” on Amazon, this is what comes up: https://www.amazon.com/Premium-Briks-Turquoise-Magenta-Builder/dp/B01F9FCM56/ref=sr_1_3?s=toys-and-games&ie=UTF8&qid=1490316318&sr=1-3&keywords=clear+duplo
Thank you! 🙂
[…] Theme – Light and Shadow […]
[…] Physics: Magnets, Gravity; Light and Shadow, Rainbows […]
[…] on wheel week, a KEVA Wrecking Ball and Keva blocks on towers week, Magna-Tiles when we study light and shadows (note, Playmags are much cheaper than Magna-Tiles, but I haven’t had a chance to compare […]
[…] To learn about how to make other weather station tools (a thermometer, a rain gauge and a weather chart), check out this post on DIY Weather Station tools. For lots of other fun weather related STEM activities for kids, check out our lesson plans on Weather and on Rainbows. You could also learn how to make a sundial in our post on Shadows. […]
[…] needed a transitional topic between our units on Light, Shadow, and Rainbows and our units on Earth Science, Planets and Stars; Weather is a logical follow-up to […]
Awesome, awesome, awesome!! Thanks for all the great stuff!! I enjoy your posts and great ideas!!!
Videos For Kids – https://www.uspstudios.co
All interesting for kids, I enoyed looking through this site.
[…] Light and Shadow Oreos? (And milk to dip them in.) Or something with distinctive silhouettes (like animal crackers) that they could shine a bright flashlight at and see its shadow on the table before eating it. […]
[…] our Light and Shadows class, we put up a shadow screen and use a shop light and let the kids make hand shadows, and […]
[…] Shadow play. Hang a sheet in a doorway. Put a lamp behind it. The child can dance around between the lamp and the sheet, putting on a shadow show for an audience on the other side. […]
[…] Just a few of the science themes are: Planets and Space Travel; Human Body; Chemical Reactions Light and Shadow; Sink or […]
[…] making sides match, paint half a butterfly then fold the paper to print the other half, or make a mirror box where they can put a toy in the center and see its reflection in multiple […]
[…] have used plastic straws for our thaumatropes and our sundials. I could substitute dowels or pencils in both those projects, though I’ll have to think about […]
[…] image: https://inventorsoftomorrow.com/2017/01/09/light-and-shadow-experiments-for-kids/ […]
[…] day could be a great day to bring in some rainbow activities or have fun with light and shadow. For lots more ideas, including optical illusions, look […]
[…] have lots more hands-on science activities about Light and Shadow. Or you may also be interested in our DIY Weather […]
[…] In a separate post, I have LOTS more light and shadow experiments. […]
[…] Wrecking Ball and Keva blocks on towers week, Crystal Climbers and Magna-Tiles when we study light and shadows (note, Playmags are much cheaper than Magna-Tiles, but I haven’t had a chance to compare […]
[…] Simple Machines, Keva blocks on towers week, translucent blocks and Magna-Tiles when we study light and shadows (note, Playmags are much cheaper than Magna-Tiles, but I haven’t had a chance to compare […]
[…] Music & Movement Monday-Shadow Play […]
[…] and describes the movement of the sun, moon and stars. (Day and night, moon phases, shadows, […]
[…] shadow screen – build a simple PVC frame to hang thin white cotton fabric, put a bright shop light behind it and chairs for an audience in front of it, and children can perform shadow dances, do shadow puppet shows, and make hand shadows on it. You can also place an old style overhead projector behind it (or where it can shine on a wall) and children can place items on it that create interesting shadows […]
[…] Source: inventorsoftomorrow.com […]
[…] Learn More: Inventors of Tomorrow […]
[…] kits, Keva blocks on towers week, translucent blocks and Magna-Tiles when we study light and shadows (note, Playmags are much cheaper, but they aren’t as high of quality, so I would choose […]
[…] times throughout the day to visually depict the Earth spinning on its axis. Learn More: Inventors of TomorrowAllow physics to meet creativity when you encourage your students to construct a catapult out of […]
Leave a comment Cancel reply

- Already have a WordPress.com account? Log in now.
- Subscribe Subscribed
- Copy shortlink
- Report this content
- View post in Reader
- Manage subscriptions
- Collapse this bar
- Activities for Kids
6 Glow-in-the-Dark Science Experiments to Try Tonight
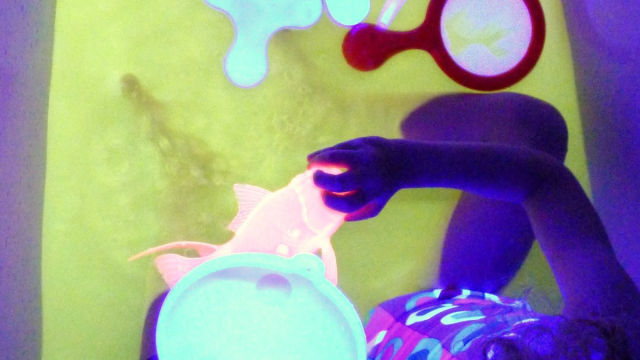
We’ve got glow-in-the-dark science worthy of any home laboratory
Calling all mad—we mean mom—scientists (and daring dads, too)! Try these six glow-in-the-dark science experiments for kids after the sun goes down: we promise they will light up your night. For more projects, check out our ultimate list of science experiments for kids .
Don’t miss any of these experiments! Save this list to Pinterest by clicking here.
Glowing Bicycle Spokes

If you're looking for a fast fix on fun, snap a few glow sticks and affix them to the spokes of a bike. When it gets dark, turn the kiddos loose on their wheels and enjoy an eerily dazzling light display. If you want to up the creativity quotient, try rearranging the glow sticks to make new patterns. Just remember to attach them well, as they have a way of taking flight!
The Science Lesson: Sensory Memory Riddle us this: Why do the three or four glow sticks you affixed to the bike spokes give the appearance of one solid line while the wheels are spinning? It's not because you're seeing the trailing lights from the glow stick. You are experiencing something known as iconic memory, which is sensory memory—or the shortest-term memory you have—that allows your mind to store an image for the few moments your brain needs to process what it has seen.
Glowing, Smoking, Bubbles
Add a little dry ice to bubble solution and the contents of an activated glow stick and get ready to rock the glow-in-the-dark scene in your neighborhood. Owlcation whipped up an awesome glow-in-the-dark science experiment to create glowing bubbles , and The Maker Mom thought to add dry ice to the same experiment here . The bubbles are out of this world—they glow and rise from the smoke. Naturally, we recommend an adult to handle the dry ice (skin contact can burn) and supervise this experiment.
The Science Lesson: Sublimation When a substance passes directly from a solid phase to a gas phase without ever becoming a liquid, it sublimates. Dry ice sublimates to gas, and the bubbles encapsulate the gas. Activated liquid from the glow stick adds to the excitement and is an example of a chemiluminescent, or a light that is produced as an energy byproduct when a chemical reaction takes place.
Glowing Pumpkin Guts Slime

For all you gore-lovers, this experiment by Little Bins for Little Hands is low on trickery and high on thrills. We used it for our inspiration, then added a little glow stick juice to the mix. Why convert pumpkin guts into a slimy putty when you can convert them into a slimy, glowing putty? Using nothing more than the contents of a glow stick, glue, and starch, you'll have a perfectly putrid pumpkin concoction in no time.
The Science Behind the Spooky: Polymers and Non-Newtonian Fluid The white glue that's used as a base in this pumpkin slime is a polymer or a large chain of molecules made up of smaller units that repeat themselves. Liquid starch changes the structure of the glue's molecular chain, making it thicker, and turning it into a non-newtonian fluid. A non-Newtonian fluid is neither a true liquid nor a true solid. You can pick it up like a solid; however, it will begin to flow like a liquid (especially when heated) and will also take the shape of its container.
Glowing Bathwater
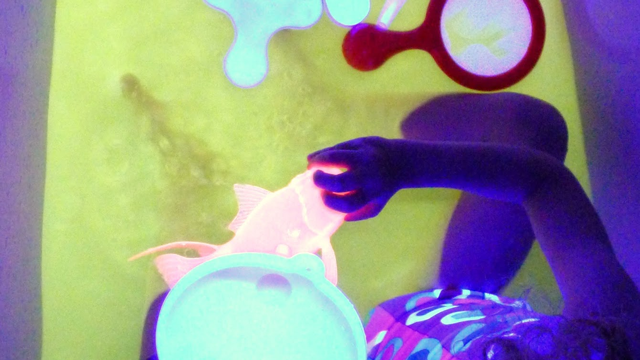
With all the options for making something glow by using the contents of a glow stick out there, we loved finding Fun at Home with Kids' recipe for glowing water that uses nothing but ground-up vitamin B-50 and a black light. And since it's not sticky and non-toxic, this makes the perfect lure for getting your bitty bats into the bathtub after a full day of haunting.
The Science Lesson: Phosphors versus Chemiluminescence Vitamin B-50 is a phosphor, or a member of a group of substances that radiate visible light after being energized by a light source, such as the UV radiation from a black light. This particular glow is different from the light created by chemiluminescence—that is, the light is emitted as a product of a chemical reaction—which you find in a glow stick.
Glowing Oil and Water Experiment

We all know that oil and water just don't mix. But what happens when you make them glow, add kids, dim the lights, and fill their brains with words like "density" and "polarity"? Magic. That's right—Pure. Magic. We love the tutorial over at Growing a Jeweled Rose , and the best part about it is how you can turn your oil and water experiment into a DIY lava lamp when you're through.
The Science Lesson: Density and Polarity An object's density—or how tightly packed together its molecules or atoms are—is a predictor of whether it will float or sink. Water molecules are more dense than oil molecules, and will always sink below oil. Additionally, water and oil have different polarities—or charges. Since water has both a negative and a positive charge, water molecules will attract other water molecules.
Glowing Sidewalk Chalk
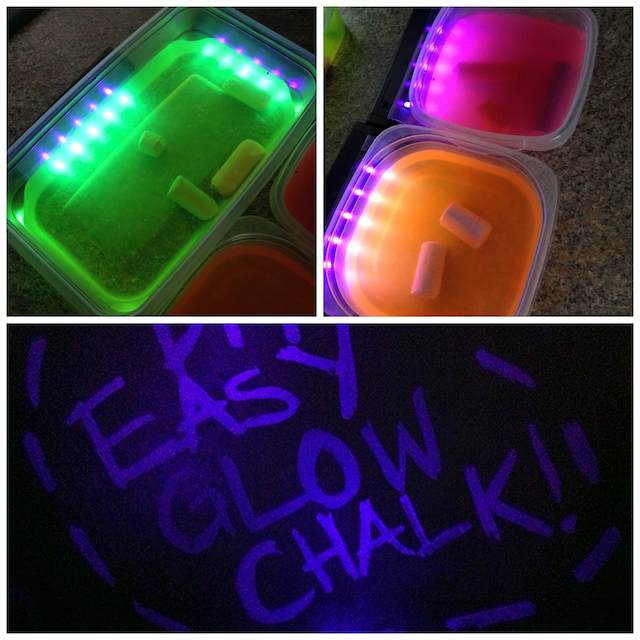
If you're really looking for some nighttime fun, you can't go wrong with this glowing sidewalk chalk. and then have them look out their windows before bedtime. This is a great one for National Night Out in August. Johanna at My Crazy Blessed Life inspired us to make our own glow-in-the-dark chalk, and we followed her recommendation to soak the chalk for two days before kicking up the fun factor with a black light.
The Science Lesson: Absorption and Properties of Salt Chalk is a salt, and salts are all distinguished by their property to absorb water. So when you let a stick of chalk soak in glowing water overnight, it will not only absorb water but also the phosphorescent properties of the glowing agent in the water.
Related: 13 Fall Science Experiments Perfect for Kids
Need some fresh ideas?
Subscribe to our weekly newsletter for expert parenting tips and simple solutions that make life instantly better.
By subscribing you agree to Tinybeans Terms and Privacy Policy
Related reads

Why Are Gen Z Kids Covering Their Noses in Family Photos?

Screen Time for Babies Linked to Sensory Differences in Toddlerhood, Study Shows

Kids Shouldn’t Have to Finish Dinner to Get Dessert, Dietitian Explains

The Questions Parents Should Be Asking Their Pediatrician—but Aren’t

6 Better Phrases to Say Instead of ‘Be Careful’ When Kids Are Taking Risks
- your daily dose

- and connection

- Your daily dose


IMAGES
COMMENTS
Jul 31, 2023 · The free STEM projects, experiments, lessons and activities below help educators teach K-12 students about the physics of light, specifically, visible light, with hands-on exploration and active learning.
Dec 18, 2023 · From simple flashlight games to hands-on experiments with shadows, these activities provide toddlers with opportunities to develop their sensory awareness, creativity, and problem-solving skills. This activity is perfect for introducing toddlers to the concept of light and shadows.
This simple light science experiment introduces three new ones: penetrate: or when light will pass through an object to be visible on the other side; reflect: or when the light bounces back at you, like with a mirror or something shiny; stop: or when the light is blocked, not reflecting or penetrating
Sep 1, 2022 · Setting up a dark environment and incorporating flashlights into your play unlocks a whole new way of looking at the world, mesmerizes tumultuous toddlers, and brings open-ended process play into your home with minimal effort. Light experiments can even work wonders on children who fear the dark.
Great for use in class or at home, these experiments are all about light, shadows and glowing. This wonderful pack has a selection of fun experiments for kids. It's great for introducing younger children (aged 5 and under) to science, with simple instructions and results.
From rainbow light refractions to exploring the visible spectrum, there are so many fascinating and fun science projects about light for children to explore.
Jan 10, 2017 · A full lesson plan for preschool or home school elementary about light and shadows. Includes crafts, song, and recommended books as well as experiments.
Aug 10, 2023 · Try these six spooky glow-in-the-dark kids science experiments that are guaranteed to light up your night.
A great way to help children to understand how light works is by organising some light experiments for kids. This is a fantastic option to start with! This is a set of simple activities that introduce science to young children, through common questions and experiences they have had.
All the experiments featured are about light, shadows and glowing. These experiments are really versatile, so you're welcome to use them both in class or at home. If you're a teacher, why not structure a fascinating lesson all about light and dark around these experiments?